I've been so inspired by the abundance of beautiful fruits and vegetables everywhere! I hope you are too!
Showing posts with label Healthy. Show all posts
Monday, July 29, 2013
Saturday, July 13, 2013
summer salad
I just love summer. It's a season that has always been overshadowed by Spring in my opinion. But this year, maybe because of the giant (green) tomatoes in my garden, I've learned to appreciate it a little more. A week or so ago, I whipped up this salad when I was craving some fresh fruits and vegetables. Obviously after a long day of work + gym + dog walking + who knows what else, I had to add a little lean protein. So I threw in some chicken breast that I had cooked the night before. (I'm really getting into food prepping on Sundays!)
This salad reminds me of one I had a couple of months ago on a vacation to the Washington coast. We stayed in the beautiful town of Pacific Beach, WA and got some sand between our toes. There was a charming little restaurant, called Mill 109 that we visited for dinner and brunch.
One night I had a starter salad with pears, almonds, and a honey vinaigrette dressing. It was divine. I tried to recreate that dressing here. Although it wasn't spot on, it was very close, and in my opinion, perfect for summertime.
Another inspiration for the salad was from one of my favorite blogs, Iowa Girl Eats. I know I've said it before, but I just adore that blog. I've made so many recipes from there, I think I've lost count. The Triple Berry Salad made my mouth water just looking at it! I'm usually not a huge fan of mixing fruit in salad, but fresh berries and spinach is definitely something I can get behind!
This salad is very simple with loads of good nutrients to get you through your next adventure!
This salad reminds me of one I had a couple of months ago on a vacation to the Washington coast. We stayed in the beautiful town of Pacific Beach, WA and got some sand between our toes. There was a charming little restaurant, called Mill 109 that we visited for dinner and brunch.
One night I had a starter salad with pears, almonds, and a honey vinaigrette dressing. It was divine. I tried to recreate that dressing here. Although it wasn't spot on, it was very close, and in my opinion, perfect for summertime.
Another inspiration for the salad was from one of my favorite blogs, Iowa Girl Eats. I know I've said it before, but I just adore that blog. I've made so many recipes from there, I think I've lost count. The Triple Berry Salad made my mouth water just looking at it! I'm usually not a huge fan of mixing fruit in salad, but fresh berries and spinach is definitely something I can get behind!
This salad is very simple with loads of good nutrients to get you through your next adventure!
Ingredients:
2 cups fresh spinach
2 cups fresh kale
1 cup organic raspberries
1 sliced pear
1/2 c. sliced almonds
for the dressing-
2 tbsp. honey
1 tbsp. poppy seeds
1/4 c. olive oil
3 tbsp. apple cider vinegar
Method:
In a large bowl combine the salad ingredients, in no particular order. Next, in a mason jar or bowl, whisk together the ingredients for your dressing, mixing well.
It's that easy, now get started!
Labels:
Clean Eating,
greens,
Healthy,
Local,
Salads
Sunday, June 2, 2013
A few things
Aaand, I'm back!
After almost a month of a blogging break, I want to share some more words and recipes, if you'll have me! You know what they all say, life has been busy, work is super slammed, etc. etc., but, when I stopped to think about it, I truly missed writing and taking pictures of my food. I mean if only 3 people in the entire world read my stories, I've reached out to someone, right? And best of all, this is a journal of sorts, that allows me to express my creativity, yada yada yada. Even though I do a ton of research and writing at work, it is always good to think outside the box sometimes and write about tastes, thoughts, and well, feelings too.
Another reason that I took a few weeks off blogging is I was training for this. I have been riding or running five days a week and my zest for photography dwindled a bit. I finally did the race yesterday; 15 miles biking, followed by 3.1 miles of running. Boy, was crossing that finish line ever amazing! I've ran races before, but never involving dual sports. It was awesome. I had a little team of my husband and dog waiting for me at the finish line, and it turns out they took some videos and photos as well (not super flattering!)
Beginning of my run.
...and after it.
I know on my last post I mentioned something about these fish tacos I made, but that's too boring for my first post back. Instead, I'll present to you my own creation, an Apple Rhubarb Strawberry Crumble. And it's not half bad for you either; it has only a little butter, a teeny bit of flour (we're nearly flour free in my household), and only a little brown sugar and natural agave nectar for a little sweetness. The lighting in our kitchen was so divine yesterday evening that my husband fired up the camera and we took some shots. Lately the weather has been too perfect. Today I found myself standing barefoot, in shorts, picking some purple kale and baby spinach for our dinner. Guess living on an island did rub off on me after all!
Anyways, lets get started. I picked this rhubarb from my backyard, used strawberries (organic) from our market, and added Pink Lady apples. They are a little pricey, but definitely worth it. Plus they're so darn pretty.
Looks good, right? Not to pat myself on the back, but... it is. It's delicious. I'm actually going to get up from the couch and eat some while I write this; I'm finding it hard to believe there are leftovers.
Ingredients:
for the crust-
3/4 c. oat flour (I put about a 1/2 cup or so of old fashioned oats in the food processor, and presto! Oat flour.)
3 tbsp. butter
2 tbsp. self rising flour
pinch of cinnamon
for the filling-
1 large Pink Lady Apple
1/2 c. of sliced rhubarb
1/2 c. of sliced strawberries
1 1/2 tsp. vanilla extract
1/4 c. diced crystallized ginger
1 tsp. agave nectar
1 tsp. corn starch
for the topping-
1/4 c. of old fashioned oats
1 1/2 tbsp. of brown sugar
1 1/2 tbsp. butter
Method:
Preheat your oven to 350 degrees. Then, in your food processor, combine all ingredients for the crust; puree until moist and the consistency of pie crust. Press into the bottom of a pie pan and bake for about 6 minutes. Next, combine all the filling ingredients in a bowl and mix gently. Allow to sit so all the juices can combine well. Finally, make your topping; combine all ingredients in the food processor, whizzing it for a minute or two. When your crust has baked for a little while, pour your filling in and crumble your topping over it.
Bake for about a half an hour, or until topping begins to turn golden brown. Your kitchen will smell amazing!
After almost a month of a blogging break, I want to share some more words and recipes, if you'll have me! You know what they all say, life has been busy, work is super slammed, etc. etc., but, when I stopped to think about it, I truly missed writing and taking pictures of my food. I mean if only 3 people in the entire world read my stories, I've reached out to someone, right? And best of all, this is a journal of sorts, that allows me to express my creativity, yada yada yada. Even though I do a ton of research and writing at work, it is always good to think outside the box sometimes and write about tastes, thoughts, and well, feelings too.
Another reason that I took a few weeks off blogging is I was training for this. I have been riding or running five days a week and my zest for photography dwindled a bit. I finally did the race yesterday; 15 miles biking, followed by 3.1 miles of running. Boy, was crossing that finish line ever amazing! I've ran races before, but never involving dual sports. It was awesome. I had a little team of my husband and dog waiting for me at the finish line, and it turns out they took some videos and photos as well (not super flattering!)
Beginning of my run.
...and after it.
I know on my last post I mentioned something about these fish tacos I made, but that's too boring for my first post back. Instead, I'll present to you my own creation, an Apple Rhubarb Strawberry Crumble. And it's not half bad for you either; it has only a little butter, a teeny bit of flour (we're nearly flour free in my household), and only a little brown sugar and natural agave nectar for a little sweetness. The lighting in our kitchen was so divine yesterday evening that my husband fired up the camera and we took some shots. Lately the weather has been too perfect. Today I found myself standing barefoot, in shorts, picking some purple kale and baby spinach for our dinner. Guess living on an island did rub off on me after all!
Anyways, lets get started. I picked this rhubarb from my backyard, used strawberries (organic) from our market, and added Pink Lady apples. They are a little pricey, but definitely worth it. Plus they're so darn pretty.
Looks good, right? Not to pat myself on the back, but... it is. It's delicious. I'm actually going to get up from the couch and eat some while I write this; I'm finding it hard to believe there are leftovers.
My crumble cooling by the window...
A little onlooker...hoping for a crumb.
Ingredients:
for the crust-
3/4 c. oat flour (I put about a 1/2 cup or so of old fashioned oats in the food processor, and presto! Oat flour.)
3 tbsp. butter
2 tbsp. self rising flour
pinch of cinnamon
for the filling-
1 large Pink Lady Apple
1/2 c. of sliced rhubarb
1/2 c. of sliced strawberries
1 1/2 tsp. vanilla extract
1/4 c. diced crystallized ginger
1 tsp. agave nectar
1 tsp. corn starch
for the topping-
1/4 c. of old fashioned oats
1 1/2 tbsp. of brown sugar
1 1/2 tbsp. butter
Preheat your oven to 350 degrees. Then, in your food processor, combine all ingredients for the crust; puree until moist and the consistency of pie crust. Press into the bottom of a pie pan and bake for about 6 minutes. Next, combine all the filling ingredients in a bowl and mix gently. Allow to sit so all the juices can combine well. Finally, make your topping; combine all ingredients in the food processor, whizzing it for a minute or two. When your crust has baked for a little while, pour your filling in and crumble your topping over it.
Bake for about a half an hour, or until topping begins to turn golden brown. Your kitchen will smell amazing!
Voila!
Sunday, April 21, 2013
Coconut Quinoa Granola
I happen to love quinoa. I love it's flexibility in recipes, it's healthy, grainy taste that makes you feel almost instantly healthy. It feels good to nourish your body, doesn't it? When I recently found this recipe on Running to the Kitchen, I knew quinoa would work as a snack too. We're definitely a granola group in my home, sprinkling it on yogurt, bringing it to work as a snack, and as a pre-workout snack. Homemade granola is so simple and will last you through the week. I recommend you try it!
Ingredients
adapted from Running to the Kitchen
3/4 c. uncooked quinoa
1/2 c. unsweetened coconut flakes
2 c. old fashioned oats
1 c. finely chopped medjool dates
1 c. finely chopped nuts (I used almonds)
1/4 tsp. sea salt
1/2 tsp. cinnamon
3 tbsp. honey
3 tbsp. melted coconut oil
Method
Preheat oven to 350 degrees. Combine all the dry ingredients (quinoa, oats, nuts, cinnamon, salt) in a large bowl, then add coconut oil and honey, tossing until combined. After spreading onto a large baking sheet in a thin layer, bake for 12-15 minutes. Check on granola and flip lightly with a spatula, clusters are okay. Allow to cool for about 10 minutes then store in airtight containers. This granola is especially tasty with a dollop of Greek yogurt and a sliced banana.
There you are, another way to use quinoa! Don't be deceived by the bird food-esque appearance, this stuff keeps a full grown husband energized!
Ingredients
adapted from Running to the Kitchen
3/4 c. uncooked quinoa
1/2 c. unsweetened coconut flakes
2 c. old fashioned oats
1 c. finely chopped medjool dates
1 c. finely chopped nuts (I used almonds)
1/4 tsp. sea salt
1/2 tsp. cinnamon
3 tbsp. honey
3 tbsp. melted coconut oil
Method
Preheat oven to 350 degrees. Combine all the dry ingredients (quinoa, oats, nuts, cinnamon, salt) in a large bowl, then add coconut oil and honey, tossing until combined. After spreading onto a large baking sheet in a thin layer, bake for 12-15 minutes. Check on granola and flip lightly with a spatula, clusters are okay. Allow to cool for about 10 minutes then store in airtight containers. This granola is especially tasty with a dollop of Greek yogurt and a sliced banana.
There you are, another way to use quinoa! Don't be deceived by the bird food-esque appearance, this stuff keeps a full grown husband energized!
Labels:
Breakfast,
Clean Eating,
Healthy
Wednesday, February 27, 2013
Comfort Food
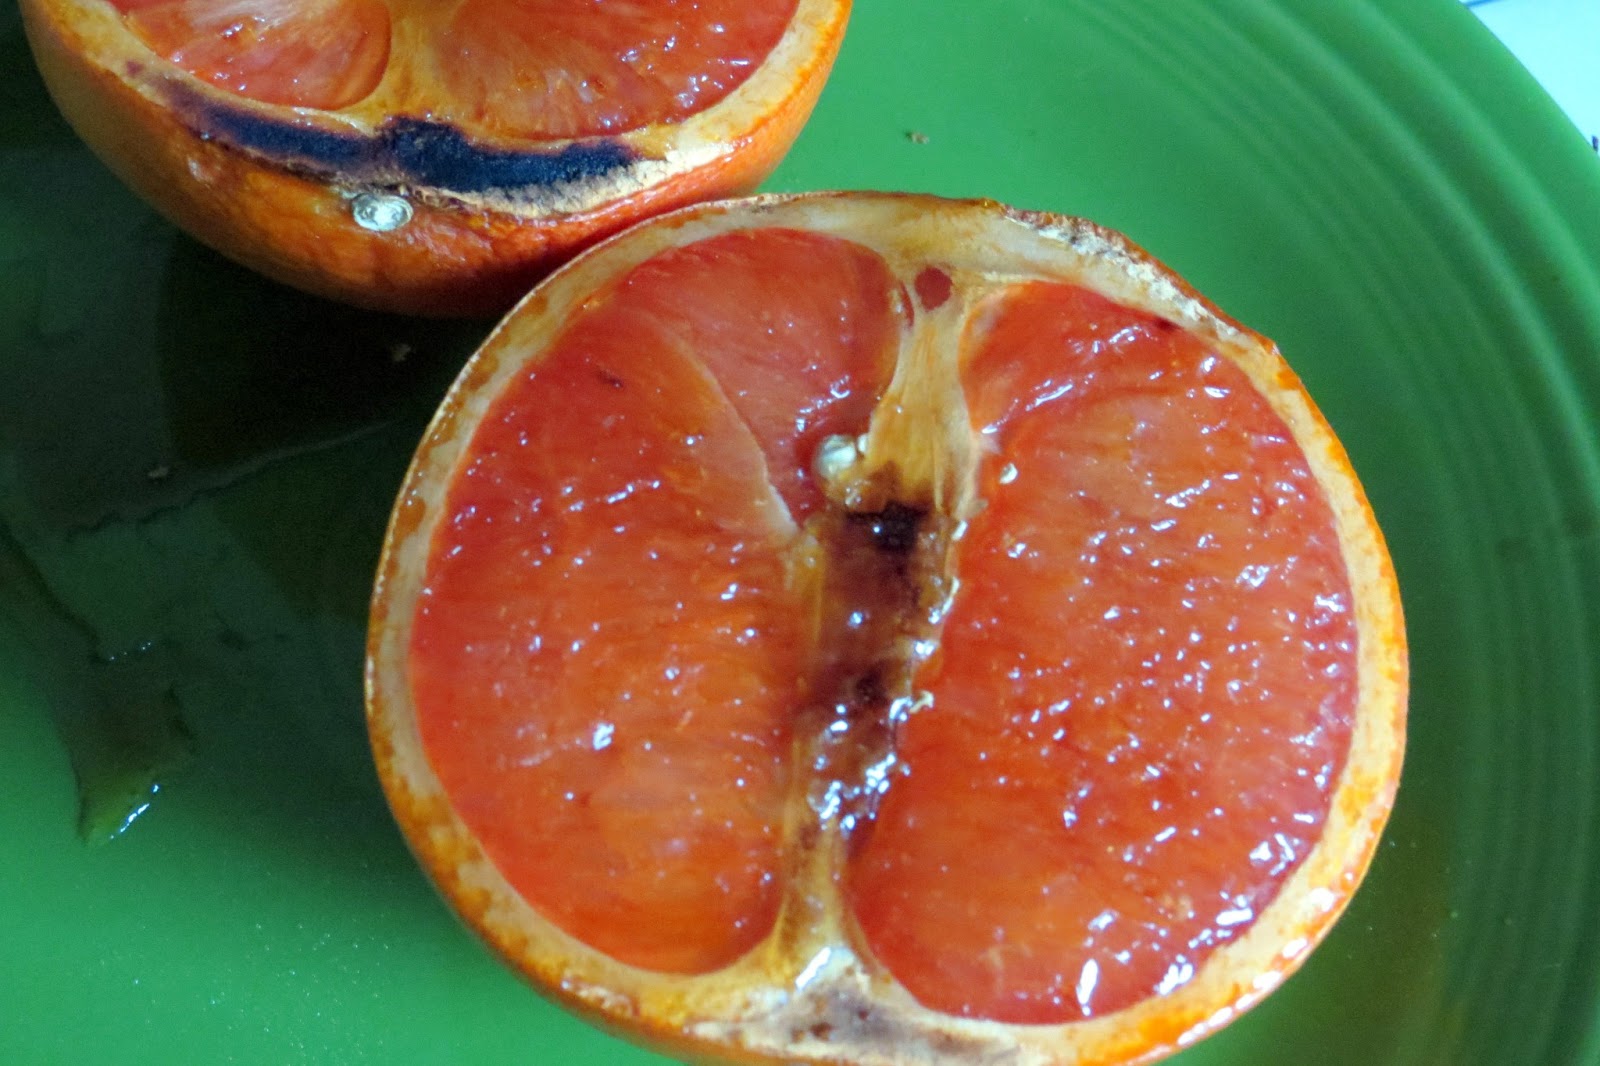
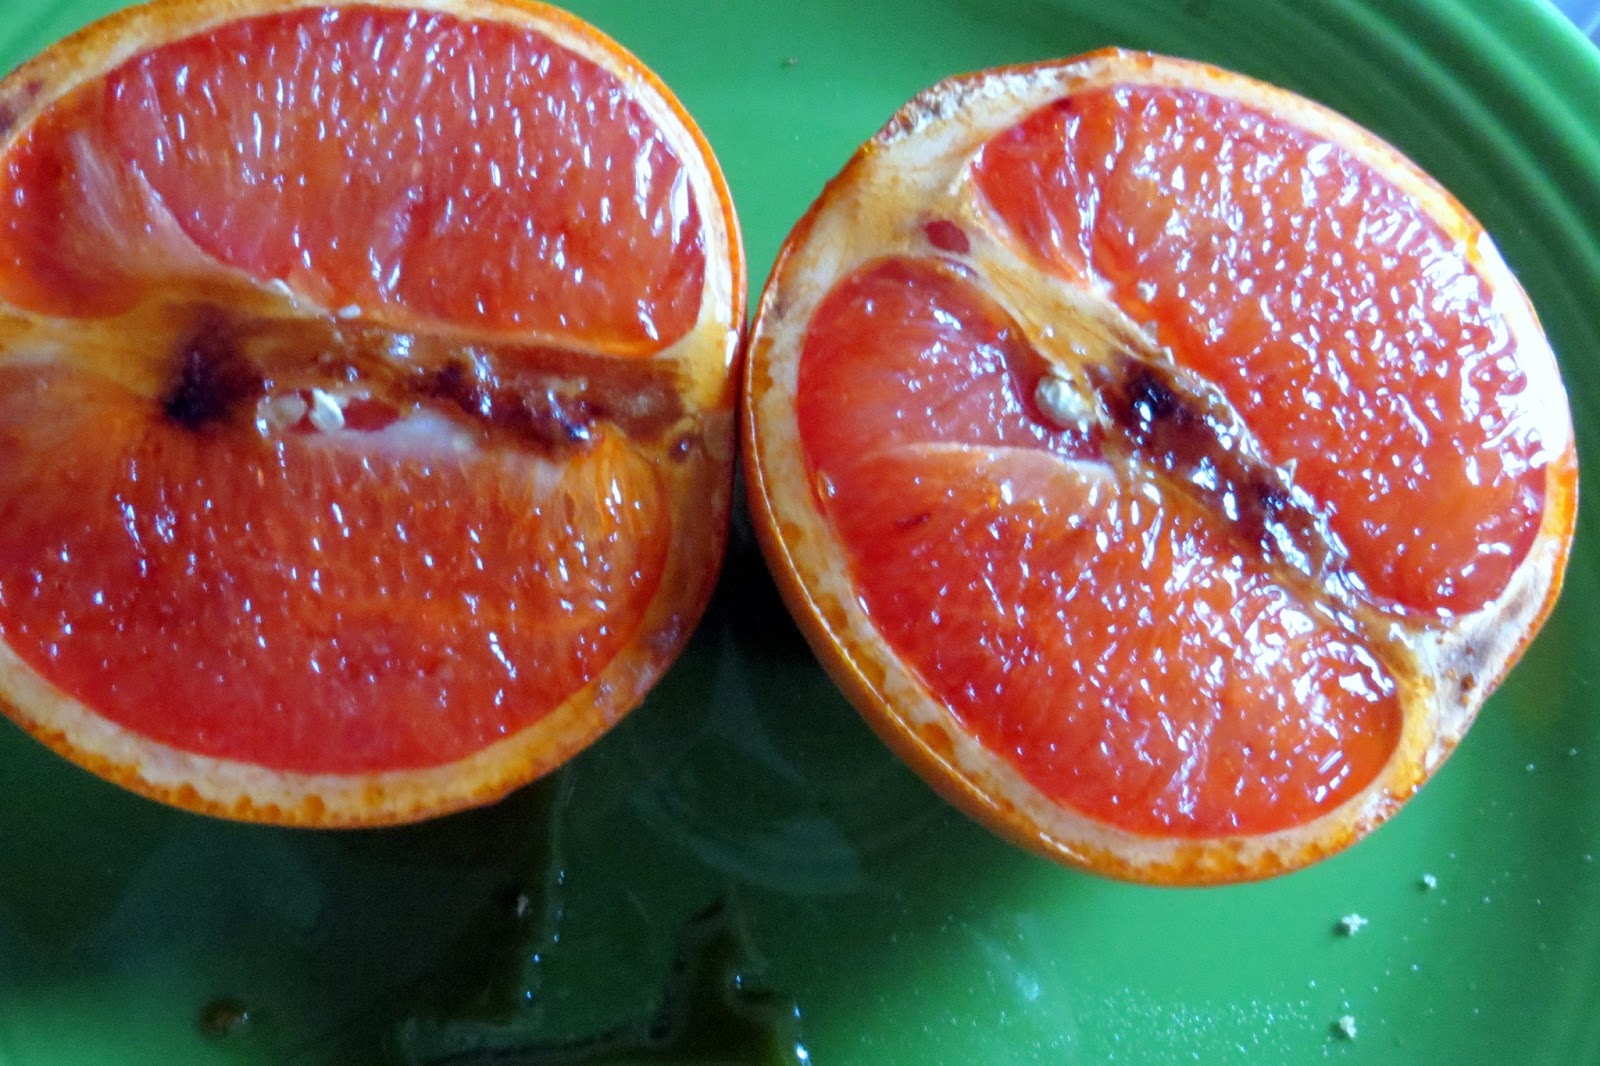
The other day, I was feeling run down and tired. I knew I needed a boost of vitamins, and fast. I quickly roasted a sweet potato and then broiled a grapefruit. The result was a flood of vitamins A and C, pectin, and lycopenes. If you're feeling run down, just grab your nearest vegetable or fruit, add some sugar, spice, or salt and you'll have a satisfying, healthy treat. These two snacks are my new comfort foods, good for a chilly, rainy, Seattle day.
Broiled Grapefruit
I recently stumbled upon this beautiful blog post from Gimme Some Oven and was quite inspired. I was not disappointed. I think next time I will add some cinnamon and sugar, as in this recipe, so as to add a little more flavor. All in all a wonderful idea and quick too!
Ingredients:
1 large ruby red grapefruit
1-3 tsp. brown sugar
Optional: 1 tsp. ginger or 1 tsp. cinnamon
Method:
Slice your grapefruit in half and cover with sugar and spices. Broil fruit about 2 inches from the heat. Cook for about 10 minutes or until the edges turn brown, your sugar sizzles, and you can't stand the smell any longer!
Roasted Sweet Potato
For my birthday, a dear friend gave my husband and I some black truffle oil, specialty sea salt, and vanilla salt from Sugarpill, an apothecary in Seattle. Delighted and excited to try all these treats, I sprinkled the coarse salt on my roasted sweet potato. Combined with the creamy Kerrygold Irish butter (hey, I'm half Irish), it was perfect. There is nothing like a roasted sweet potato with just a teaspoon of butter and salt. To me, it tastes like sitting in front of the fire, or waking up warm on a sunny Saturday morning in April. If this sounds too dramatic for you, just try it.
Broiled Grapefruit
I recently stumbled upon this beautiful blog post from Gimme Some Oven and was quite inspired. I was not disappointed. I think next time I will add some cinnamon and sugar, as in this recipe, so as to add a little more flavor. All in all a wonderful idea and quick too!
Ingredients:
1 large ruby red grapefruit
1-3 tsp. brown sugar
Optional: 1 tsp. ginger or 1 tsp. cinnamon
Method:
Slice your grapefruit in half and cover with sugar and spices. Broil fruit about 2 inches from the heat. Cook for about 10 minutes or until the edges turn brown, your sugar sizzles, and you can't stand the smell any longer!
Roasted Sweet Potato
For my birthday, a dear friend gave my husband and I some black truffle oil, specialty sea salt, and vanilla salt from Sugarpill, an apothecary in Seattle. Delighted and excited to try all these treats, I sprinkled the coarse salt on my roasted sweet potato. Combined with the creamy Kerrygold Irish butter (hey, I'm half Irish), it was perfect. There is nothing like a roasted sweet potato with just a teaspoon of butter and salt. To me, it tastes like sitting in front of the fire, or waking up warm on a sunny Saturday morning in April. If this sounds too dramatic for you, just try it.
Ingredients (makes one serving):
1 large sweet potato
1 tsp. butter
1 tsp. coarse sea salt
Method:
Preheat your oven to 350 degrees. In an oven safe bowl or on a baking sheet, place your sweet potato and puncture with a few holes to release the heat. Roast for about 40-60 minutes until soft and the skin is crinkly. Slice open and cover with sea salt and butter. And last but not least, enjoy!
Labels:
Clean Eating,
Fruit,
Healthy,
Snacks
Monday, February 11, 2013
Spicy 'Cajun Chicken with Mardi Gras Salsa'
I am always so inspired by my daily inbox greeting from Iowa Girl Eats. This blog is not only pleasing aesthetically, but also, the recipes are healthy, filling, and simple. I also thoroughly enjoy Friday Favorites and look forward to what Iowa Girl has to share!
One of the latest recipes, Cajun Chicken with Mardi Gras Salsa, had me so inspired as I checked my e-mail this A.M., that I set out to make it as soon as I got home. My lovely husband had already done an insane amount of mundane chores by the time I got home, so I thought I'd cook him up something healthy and fulfilling before he headed out to hockey practice. Not only was this meal husband approved, it was me-approved, as a recent clean eating devotee. My salsa isn't quite the same as Iowa Girl's, but I loved the Mardi Gras "theme" so I kept it!
Ingredients:
1 lb. skinless, boneless, organic chicken breast, halved and pounded (if desired)
1 tsp. sea salt
2 tbsp. cajun seasoning (one tbsp. per side of chicken)
3 tbsp. extra virgin olive oil
sprinkle of homemade taco seasoning
Juice of 1 lime
Salsa-
1 small can pineapple rings, diced
1 medium sized mango
1/2 yellow, red, or orange bell pepper, sliced
1 tsp. sea salt
1 c. medium-hot salsa, I used Trader Joe's Salsa Authentica (no preservatives! no thickening agents!)
Juice from 1 lime
Method:
Heat oil in large skillet on medium high heat for a minute or two. Add thinly cut chicken breasts to the pan and season them, adding more spices if desired. Cook for about 6 minutes, then flip and season the other side of meat.
Meanwhile, combine all the salsa ingredients in a bowl and let the fruit absorb the juices. Check your meat, it should be golden brown and should have developed a crust from all the seasonings and olive oil. Scrape the bottom of the pan and sprinkle with lime juice. Turn heat off and transfer to plates. Top with salsa and chow down!
One of the latest recipes, Cajun Chicken with Mardi Gras Salsa, had me so inspired as I checked my e-mail this A.M., that I set out to make it as soon as I got home. My lovely husband had already done an insane amount of mundane chores by the time I got home, so I thought I'd cook him up something healthy and fulfilling before he headed out to hockey practice. Not only was this meal husband approved, it was me-approved, as a recent clean eating devotee. My salsa isn't quite the same as Iowa Girl's, but I loved the Mardi Gras "theme" so I kept it!
Ingredients:
1 lb. skinless, boneless, organic chicken breast, halved and pounded (if desired)
1 tsp. sea salt
2 tbsp. cajun seasoning (one tbsp. per side of chicken)
3 tbsp. extra virgin olive oil
sprinkle of homemade taco seasoning
Juice of 1 lime
Salsa-
1 small can pineapple rings, diced
1 medium sized mango
1/2 yellow, red, or orange bell pepper, sliced
1 tsp. sea salt
1 c. medium-hot salsa, I used Trader Joe's Salsa Authentica (no preservatives! no thickening agents!)
Juice from 1 lime
Method:
Heat oil in large skillet on medium high heat for a minute or two. Add thinly cut chicken breasts to the pan and season them, adding more spices if desired. Cook for about 6 minutes, then flip and season the other side of meat.
Meanwhile, combine all the salsa ingredients in a bowl and let the fruit absorb the juices. Check your meat, it should be golden brown and should have developed a crust from all the seasonings and olive oil. Scrape the bottom of the pan and sprinkle with lime juice. Turn heat off and transfer to plates. Top with salsa and chow down!
Labels:
Clean Eating,
Entrees,
Healthy
Tuesday, January 22, 2013
DIY Clif Bars
I have been eating Clif, Lara, Raw, and pretty much any kind of healthy date based bars for quite some time. If you're also a fan, you'd know that the soft nutritious goodness that you enjoy with the first bite and lasts through the entire snack. These days, a Clif Bar or Larabar may cost you up to a $1.25 a piece and while I wish I could tell you I calculated the money I've saved down to the homemade bar, I can tell you that they're worth every penny. My 8 x 8 pan made about 6-8 bars, but they lasted about one and a half days. They are great for breakfast, pre-workout snacking, post workout snacking, and anything in between.
Ingredients:
2 cups diced medjool (pitted) dates
1/2 c. dark chocolate chips
1/2 c. peanut butter
1/4 c. crushed pecans
Method:
Cover your 8 x 8 pan with a piece of parchment paper, leaving about 3" on each side. Next cut your thinly diced dates and peanut butter in your Kitchenaid or food processor on medium to high speed in order to thoroughly combine them with the peanut butter. Add chocolate chips and spoon into your 8 x 8 pan, then press with your hands into all corners. Cover with the remaining parchment paper and leave in the refrigerator for at least three hours. Slice and enjoy!
Ingredients:
2 cups diced medjool (pitted) dates
1/2 c. dark chocolate chips
1/2 c. peanut butter
1/4 c. crushed pecans
Method:
Cover your 8 x 8 pan with a piece of parchment paper, leaving about 3" on each side. Next cut your thinly diced dates and peanut butter in your Kitchenaid or food processor on medium to high speed in order to thoroughly combine them with the peanut butter. Add chocolate chips and spoon into your 8 x 8 pan, then press with your hands into all corners. Cover with the remaining parchment paper and leave in the refrigerator for at least three hours. Slice and enjoy!
Monday, January 21, 2013
Quinoa Cakes
A week or so ago I made these Cheesy Quinoa Cakes. YUM.
They were crisp and refreshingly healthy. That feeling of feeding your body something wonderfully nutritious definitely is an after effect. I varied the recipe a bit, and omitted the aoli sauce, but the original is great I am sure. I added a side of garlicky kale, and for lunch, included some salsa. Although they were delectable with their own cheesiness and a little taste of olive oil, I would imagine most people would like to add a sauce or dip of some sort, so go ahead and experiment!
Ingredients (adapted from here):
2 cups cooked quinoa
2/3 cup grated gouda cheese
3 tablespoons all purpose flour
1 egg, lightly beaten
2 teaspoons freshly ground black pepper
2 ½ tablespoons extra virgin olive oil
salt to taste
Method:
For the cakes:
Preheat oven to 250 degrees. Place all ingredients, except for the oil, into a mixing bowl and stir together until well combined. Season with salt and allow to sit for 5 minutes. Pour oil into a large saucepan and place over medium heat. Form ¼ cup patties with the quinoa mixture and place in the heated pan. You may have to do a few batches, but it'll be worth it! Cook quinoa cakes for about 5 minutes on each side, until the the edges have browned and they look crisp. Flip carefully with a spatula and place on a warming plate in the preheated oven. Repeat with the remaining patties until all of the cakes have been cooked.
For the kale:
Throw in four to five handfuls of roughly cut and washed kale with a clove or two of garlic and olive oil. Sprinkle with sea salt, cover, and leave to simmer on medium heat for about fifteen minutes. Voila!
Feed them to someone you love, your child, your husband, your momma. They'll thank you for these crunchy and flavorful patties. They'd be perfect for a party appetizer or alongside some tomato soup.
Coming soon to a blog near you... DIY Larabars and Baked Oatmeal... !!
They were crisp and refreshingly healthy. That feeling of feeding your body something wonderfully nutritious definitely is an after effect. I varied the recipe a bit, and omitted the aoli sauce, but the original is great I am sure. I added a side of garlicky kale, and for lunch, included some salsa. Although they were delectable with their own cheesiness and a little taste of olive oil, I would imagine most people would like to add a sauce or dip of some sort, so go ahead and experiment!
Ingredients (adapted from here):
2 cups cooked quinoa
2/3 cup grated gouda cheese
3 tablespoons all purpose flour
1 egg, lightly beaten
2 teaspoons freshly ground black pepper
2 ½ tablespoons extra virgin olive oil
salt to taste
Method:
For the cakes:
Preheat oven to 250 degrees. Place all ingredients, except for the oil, into a mixing bowl and stir together until well combined. Season with salt and allow to sit for 5 minutes. Pour oil into a large saucepan and place over medium heat. Form ¼ cup patties with the quinoa mixture and place in the heated pan. You may have to do a few batches, but it'll be worth it! Cook quinoa cakes for about 5 minutes on each side, until the the edges have browned and they look crisp. Flip carefully with a spatula and place on a warming plate in the preheated oven. Repeat with the remaining patties until all of the cakes have been cooked.
For the kale:
Throw in four to five handfuls of roughly cut and washed kale with a clove or two of garlic and olive oil. Sprinkle with sea salt, cover, and leave to simmer on medium heat for about fifteen minutes. Voila!
Coming soon to a blog near you... DIY Larabars and Baked Oatmeal... !!
Labels:
Clean Eating,
Entrees,
Healthy
Monday, January 7, 2013
Italian Wedding Soup
Pop Quiz: What makes two people's three dinners, two lunches, and fills a whole leftover Martha Stewart BPA-free glassware? The answer, my friends, is Italian Wedding Soup. You didn't hear it from me, but this stuff fulfills all the food groups, ensures your fill of kale for a day, and pumps you up full of vitamins. And, it's delicious. After my mother mentioned the other night that she was making this delightfully cultural (I mean it has the word Italian in the title), I decided to embark on the journey that is soup making myself. I was prepared for an arduous trip, full of blending, food processing, slicing, and dicing. But I was wrong.
Approximately 40 minutes later, I had a delicious meal and used only 2 pots and one mixing bowl. Since we live in a pretty adorable retro house (I'm talking 1920's), there isn't a ton of counter space, though it is more than enough for me. So, it is a testament as to how simple this soup can be. My husband didn't even blink when he walked into the kitchen. Now that's a good sign.
Some Italian wedding soup recipes call for orzo, which I think would be good, but I chose to use barley, after seeing it in the grain aisle at Trader Joe's. Plus, I'm frighteningly adventurous. I also added a few chopped mushrooms to my own recipe, and made the meatballs a little bigger than I have had in the past.
The result was fabulous. Like I said, it fed my small family of two for days and days. Now we're moving on to something else, like chicken. But we'll be back to that soup.
*Note: I based my recipe off this one from The Kitchn. However, I lightened it up quite a bit, omitting the cheese, eggs, garlic, and onion. I used a pinch of garlic salt, and that quickened up the process.
Ingredients:
1- 1 1/2 lb. ground turkey, or chicken (white lean meat)
3 tbsp. olive oil
1 tsp. oregano
1 tsp. garlic salt
1/2 c. Italian flavored dry breadcrumbs (I love Progresso)
8 cups organic chicken broth (low sodium is OK)
2 1/2 cups dry barley
4 cups kale, torn into small to medium sized chunks
1 cup diced carrots
1/2 cup sliced mushrooms
Method:
Heat two burners to medium heat. Coat a large saucepan with olive oil, swirling to cover all surfaces. In a large mixing bowl, combine pinch of sea salt, breadcrumbs, and ground turkey and mix thoroughly. Form into meatballs. You will likely have around 20 meatballs, 30 if you make them smaller. I made mine about the size of a large tablespoon. Place them in the well oiled pan, which should be relatively hot by now and cover loosely with a lid.
In a large 3.5 quart or bigger pot, bring chicken broth to a rolling boil, then add barley. Allow to boil for a minute or two, then bring to a bubbling simmer. Add kale, carrots, and mushrooms. Allow to simmer with the lid on your pot for about 15-20 minutes. The barley will cook itself, which is a nice little time saver. After about seven minutes, check your meatballs and flip them so that they are evenly brown. Since I didn't want to use two pans, I lined a cookie sheet with aluminum foil and baked the remaining meatballs at 400 degrees for about ten minutes total, flipping them halfway through.
Once your meatballs are cooked through (you can check by cutting one open), add them to the broth and vegetable mixture, and let simmer for about ten minutes, so the flavors can meld together.
And there you have it! We had some tasty multi-grain crackers from Trader Joe's with it last night, and I added some eggplant hummus. Yum.
I think I know what I'm having for lunch tomorrow!
Ciao,
k
Approximately 40 minutes later, I had a delicious meal and used only 2 pots and one mixing bowl. Since we live in a pretty adorable retro house (I'm talking 1920's), there isn't a ton of counter space, though it is more than enough for me. So, it is a testament as to how simple this soup can be. My husband didn't even blink when he walked into the kitchen. Now that's a good sign.
Some Italian wedding soup recipes call for orzo, which I think would be good, but I chose to use barley, after seeing it in the grain aisle at Trader Joe's. Plus, I'm frighteningly adventurous. I also added a few chopped mushrooms to my own recipe, and made the meatballs a little bigger than I have had in the past.
The result was fabulous. Like I said, it fed my small family of two for days and days. Now we're moving on to something else, like chicken. But we'll be back to that soup.
*Note: I based my recipe off this one from The Kitchn. However, I lightened it up quite a bit, omitting the cheese, eggs, garlic, and onion. I used a pinch of garlic salt, and that quickened up the process.
Ingredients:
1- 1 1/2 lb. ground turkey, or chicken (white lean meat)
3 tbsp. olive oil
1 tsp. oregano
1 tsp. garlic salt
1/2 c. Italian flavored dry breadcrumbs (I love Progresso)
8 cups organic chicken broth (low sodium is OK)
2 1/2 cups dry barley
4 cups kale, torn into small to medium sized chunks
1 cup diced carrots
1/2 cup sliced mushrooms
Method:
Heat two burners to medium heat. Coat a large saucepan with olive oil, swirling to cover all surfaces. In a large mixing bowl, combine pinch of sea salt, breadcrumbs, and ground turkey and mix thoroughly. Form into meatballs. You will likely have around 20 meatballs, 30 if you make them smaller. I made mine about the size of a large tablespoon. Place them in the well oiled pan, which should be relatively hot by now and cover loosely with a lid.
In a large 3.5 quart or bigger pot, bring chicken broth to a rolling boil, then add barley. Allow to boil for a minute or two, then bring to a bubbling simmer. Add kale, carrots, and mushrooms. Allow to simmer with the lid on your pot for about 15-20 minutes. The barley will cook itself, which is a nice little time saver. After about seven minutes, check your meatballs and flip them so that they are evenly brown. Since I didn't want to use two pans, I lined a cookie sheet with aluminum foil and baked the remaining meatballs at 400 degrees for about ten minutes total, flipping them halfway through.
Once your meatballs are cooked through (you can check by cutting one open), add them to the broth and vegetable mixture, and let simmer for about ten minutes, so the flavors can meld together.
And there you have it! We had some tasty multi-grain crackers from Trader Joe's with it last night, and I added some eggplant hummus. Yum.
I think I know what I'm having for lunch tomorrow!
Ciao,
k
Labels:
Clean Eating,
Healthy,
Italian
Monday, December 10, 2012
Healthy Holiday Snacking
Believe me, I know as well as anybody how tempting holiday treats can be. Just set foot in a Trader Joe's and you'll see Peppermint-Chocolate-Covered This and Hazelnut -White Chocolate Dipped That. It's hard, my friends, it's hard. However, when you are ever so tempted, just whip up some homemade cheez its and some pear-apple sauce (made entirely of pears!) With our schedule getting a little tighter due to new jobs, attempting to run outside most days, Christmas shopping, and planning Christmas Eve dishes, we've been trying to be mindful of what we're putting in our bodies. These treats, although not made of quinoa and flaxseed, are free of artificial ingredients and colors. You may even find the ingredients in your pantry right now!
Next, a perfect compliment for your snacking, pear (apple) sauce. I would just call it "pear sauce", but that sounds pretty strange and unappetizing. At least to me, so bear with me.
Simply roughly cut up your pre-skinned pears and pile them in a large sauce pan, then add 2 tbsp. warm water. Bring to a simmer slowly, then add the remainder of your ingredients, in no particular order. You may want to use less brown sugar, since the pears are generally very sweet, but it's up to you. Cover pan and allow to simmer for about 15 minutes, checking frequently. Then bring heat down to a low and let sit covered for about 30 minutes.
Let cool before serving, burned tongues would not be fun. Serve to your loved ones, or have it in front of a crackling fire. Either way, know that something warm, healthy, and delicious is about to nourish your holiday addled mind!
Although I'd like to take credit for this ingenious recipe, I borrowed these yummy, bite sized cheese snacks from A Chow Life, an amazing blog. These do not take very long to make and they'll keep you satisfied when you're running around, shopping, or picking out your Christmas tree.
Ingredients:
3-4 soft Bosc pears, I'm sure you can use other varieties, but these are my favorite.
1 tbsp. cinnamon
3 tbsp. c. brown sugar
1 pinch of salt
1 tsp. nutmeg
1 tsp. ginger
1 tbsp. light corn syrup
2 tbsp. warm water
Method:
This recipe is so easy you could do it while poring over the awe inspiring Nigella Lawson book, How to Be a Domestic Goddess. I am so specific, because that is precisely what I was doing while making this pear sauce.
Let cool before serving, burned tongues would not be fun. Serve to your loved ones, or have it in front of a crackling fire. Either way, know that something warm, healthy, and delicious is about to nourish your holiday addled mind!
Monday, November 26, 2012
Clean Eating: Mom's Apple Pie
For years now I've enjoyed my Mom's Apple Pie. The crust: flaky, thick, and warm. The apples: spicy and naturally sweet. Last night I had a strong hankering for this pie and decided to whip it up in my own kitchen.
I have so many memories of slicing the apples, sprinkling them with cinnamon, nutmeg, ginger, and allspice, and then being unable to resist eating them straight out of the mixing bowl. The nice thing about this pie is that it contains no butter, no sugar, and nothing artificial. That's right, no sugar. The sweetness of your apples should do the trick.
And while it's no Martha Stewart apple pie, it certainly is better for your waistline. I am happy to say that with the Clean Eating rage, it's nice to know that my mother had been feeding us "clean" apple pie for our whole lives! Way ahead of our time.
Ingredients:
2 2/3 cups flour
3/4 cup vegetable oil or 3/4 cup canola oil
4 tablespoons cold water
4-5 medium sized Pink Lady or Gala apples; or 3-4 large apples; sliced thinly
1 tbsp. cinnamon
1 tsp. nutmeg
1 tsp. allspice
1 tsp. ground ginger
Method: adapted from Mom's crust recipe and Food.com
Measure flour and salt into bowl. Add oil; mix with a fork, until particles are the size of small peas. Sprinkle with water, 1 tablespoon at a time, until flour is moistened and dough almost cleans the sides of the bowl.
Depending on whether your dough seems to dry or wet, add either a tbsp. of oil or flour. Pick dough up and ball it together into one pressed ball. Work the dough in your hands to make it a bit less crumbly.
Break dough in half and similar to rolling pizza dough, press it flat between two sheets of wax paper. Roll out into the general circumference and shape of your pie pan. Gently peel off one sheet of wax paper and turn dough upside down. Peel off remaining sheet of wax paper after placing bottom crust into pan leaving a 1/2 inch overlap around pan edge. Follow the above steps with top crust rolling out same as bottom crust leaving 1 inch overhang around pan edge). Fold and roll top edge over pie pan and press edges together with a fork.
Once your apples are sliced, throw them in a large mixing bowl. Add spices and stir well. Allow apples to sit at room temperature for about 3 hours, to macerate in their own juices. Pour apples into crust, then fold the pie dough for the top over pie pan, roll top edge over pie pan and press edges together with a fork.
Slice about 6 slits in the middle of the pie and place in the oven for about 45-55 minutes. Check at 45 minutes and take pie out when edges are golden brown.
Allow to cool for about 15 minutes, then serve! It's yummy with a scoop of frozen yogurt, or my unconventional favorite- Coconut Bliss. Now, off to decorate for Christmas!
Subscribe to:
Posts (Atom)